Sleeper Retaining Wall Guide (Concrete vs Timber)
Comprehensive sleeper retaining wall comparison: concrete vs timber performance, installation methods, height limits, drainage essentials, and realistic longevity for Australian conditions.
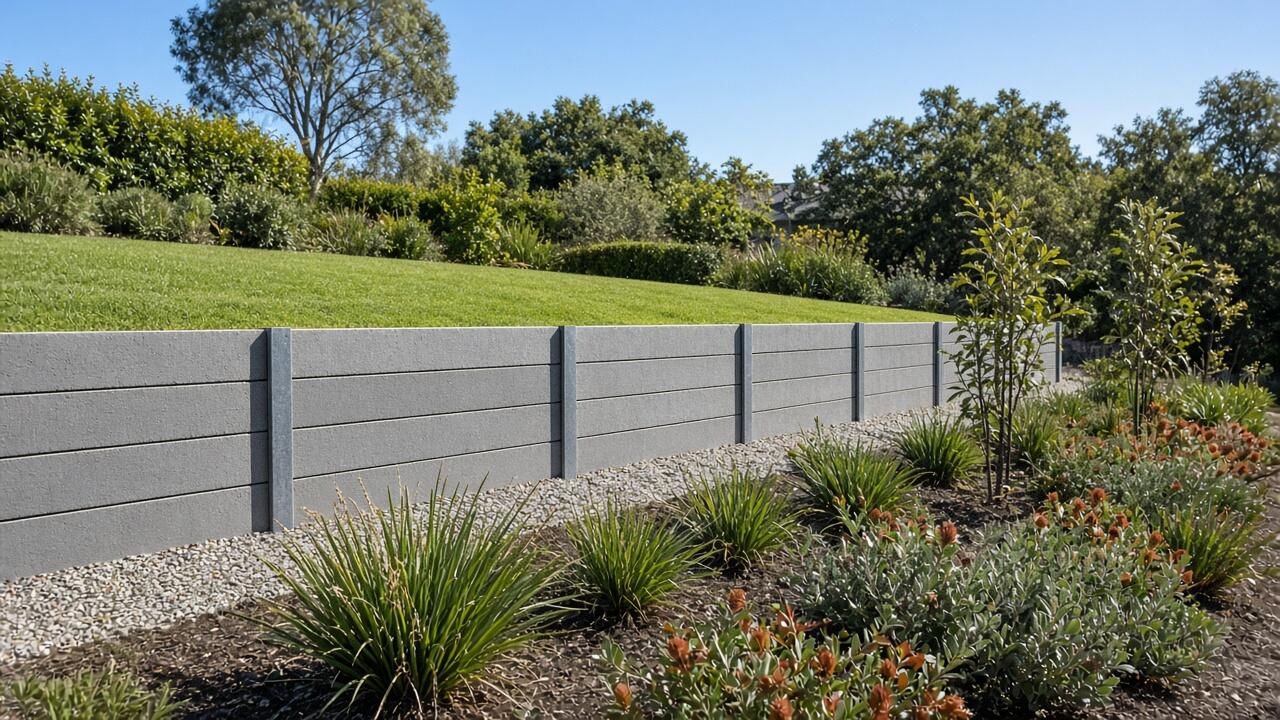
Sleeper retaining walls dominate Australian residential landscaping—vertical or horizontal arrangements of timber or concrete sleepers create terracing, raised garden beds, and slope management throughout suburban Melbourne and Peninsula properties. Yet fundamental differences between timber and concrete sleeper performance, installation complexity by height, and drainage requirements that determine long-term success versus premature failure demand careful understanding before committing to materials and methods.
This comprehensive guide compares concrete and timber sleeper characteristics, realistic lifespan expectations under Australian climate conditions, proper installation techniques, height limitations before engineering becomes essential, and critical drainage design that prevents the water pressure failures causing expensive wall collapses and reconstruction.
Concrete vs Timber Sleepers: Core Differences
Material characteristics that drive performance, cost, and suitability.
Concrete Sleeper Advantages
Durability and longevity:
- 40-60+ year lifespan typical
- Impervious to termites, rot, decay
- Unaffected by moisture exposure
- No treatment degradation
- Coastal conditions excellent (salt-resistant)
- Effectively permanent solution
Low maintenance:
- No oiling or sealing required
- No inspection for termite or rot damage
- Occasional cleaning only
- Set-and-forget installation
Structural consistency:
- Uniform dimensions (easier stacking)
- Predictable strength properties
- No warping, twisting, or shrinkage
- Engineering calculations reliable
Best value long-term:
- Higher initial cost offset by lifespan (cost-per-year lowest)
- No replacement needed decades
- No ongoing maintenance costs
- One-time investment
Concrete Sleeper Disadvantages
Weight and handling:
- 60-100kg per sleeper (requires 2-3 people minimum)
- Physically demanding installation
- Equipment helpful large projects (excavator, bobcat, or crane)
- Delivery logistics (heavy pallet, machinery access needed)
Aesthetic limitations:
- Manufactured uniform appearance (some dislike consistency)
- Less natural character than timber
- Contemporary or modern styles (doesn’t suit heritage properties)
- Though timber-look concrete sleepers available (textured and coloured)
Initial cost:
- More expensive than treated pine upfront ($80-150 per sleeper vs $25-45 treated pine)
- Comparable or slightly more than hardwood
- Labour costs similar (weight offsets easier stacking)
Timber Sleeper Advantages
Natural aesthetic:
- Warm organic appearance
- Grain and texture character
- Weathers naturally (silver-grey patina)
- Suits cottage, heritage, bush settings
Lighter weight:
- Easier handling (1-2 people for most sleepers)
- DIY-friendlier (manageable without equipment)
- Simpler delivery and site movement
Workability:
- Easier cutting (chainsaw vs concrete saw)
- Simpler drilling
- More forgiving DIY mistakes
- Field modifications straightforward
Initial cost (treated pine):
- Cheaper upfront ($25-45 per sleeper)
- Accessible tight budgets
- Though long-term cost higher (replacement needed)
Timber Sleeper Disadvantages
Limited lifespan:
- Treated pine: 10-20 years typical (Melbourne conditions)
- Hardwood: 25-40 years (better but still not permanent)
- Coastal humid Peninsula: shorter life (8-15 years treated pine common)
- Clay soil moisture: accelerates deterioration
Ongoing maintenance and concerns:
- Annual termite inspection recommended
- Rot monitoring (particularly ground-contact points)
- Treatment degradation (UV and moisture)
- Eventual replacement inevitable
Vulnerability:
- Termites (treatment deters but doesn’t prevent)
- Rot and fungal decay (wet conditions)
- Bushfire risk (BAL zones may prohibit)
- Chemical treatment concerns (vegetable gardens)
Variable quality:
- Treatment quality varies (affects lifespan)
- Timber density varies (structural consistency less predictable)
- Warping and twisting possible
- Cracks and checks develop (moisture entry points)
For detailed comparison of all retaining wall material options including stone, blocks, and gabions, see our comprehensive guide on garden retaining wall options compared.
Installation Methods
Different approaches suit varying heights and skill levels.
Vertical Sleeper Installation (Most Common DIY)
How it works:
- Sleepers placed vertically (narrow edge up)
- Steel posts or H-beams anchor sleepers into ground
- Post driven through sleeper (drilled hole) into ground
- Simplest DIY method for low walls
Advantages:
- Relatively simple DIY technique
- Suitable low walls (under 600mm)
- Minimal excavation required
- Fast installation
- Individual sleepers replaceable
Disadvantages:
- Not suitable high walls (limited structural capacity)
- Lateral load capacity limited
- Engineering rarely approves over 1m height
- Post placement critical (spacing and depth)
Typical specifications:
- Sleeper height: 1.8-2.4m (standard lengths)
- Exposed height: 400-800mm maximum safely
- Buried depth: 600mm+ (deeper better stability)
- Post spacing: 1.8-2.4m centres
- Steel posts: 40x40mm SHS or 50x50mm star pickets minimum
Best for:
- Garden bed edging (300-500mm height)
- Low retaining walls (under 600mm retained height)
- Straight walls (curves difficult this method)
- DIY builders (manageable skill level)
Horizontal Sleeper Installation (Stacked)
How it works:
- Sleepers laid horizontally (like bricks)
- Stacked to desired height
- Steel posts driven through stacked sleepers or beside them
- Interlocking or pinned together
- More substantial structure than vertical
Advantages:
- Stronger lateral load capacity (better for higher walls)
- Visual mass and permanence
- Concrete sleepers ideal this method (interlocking systems)
- Suitable walls up to 1m+ with proper engineering
Disadvantages:
- More complex installation
- Requires proper footings (concrete or compacted gravel)
- Level accuracy critical (compounds errors each course)
- Heavier (concrete sleepers particularly demanding)
- Engineering required walls over 1m typically
Typical specifications:
- Sleeper dimensions: 200x75mm to 250x100mm typical
- Course height: 150-250mm per sleeper
- Four courses: approximately 800mm wall height
- Steel posts: 65x65mm or larger SHS, driven 1.2m+ deep
- Post spacing: 1.2-1.8m centres (tighter for taller walls)
Best for:
- Retaining walls 600mm-1.2m height
- Permanent substantial walls
- Concrete sleepers (purpose-built for horizontal stacking)
- Professional installation (skill and equipment helpful)
For specific guidance on timber sleeper installations including treatment requirements and termite considerations, see our detailed guide on timber sleeper retaining walls: pros, cons, climate.
Concrete Sleeper-Specific Systems
Interlocking sleepers:
- Lip or groove systems (stack like Lego blocks)
- No posts required some designs
- Faster installation than post-based
- Popular DIY-friendly concrete option
- Height limits apply (typically 1.2m maximum without engineering)
Post-through-hole system:
- Holes cast in concrete sleepers
- Steel posts driven through holes
- Strong reliable method
- Standard approach taller concrete walls
- Engineering specifies post size and spacing
Pinned sleepers:
- Steel dowels or rebar pin sleepers together
- With or without vertical posts
- Creates rigid stack
- Suitable moderate heights
For comprehensive coverage of concrete sleeper specifications, installation techniques, and when they’re the better choice, see our guide on concrete sleeper retaining walls explained.
Height Limits and Engineering
Understanding safe DIY limits versus professional engineering requirements.
DIY-Safe Heights (General Guidelines)
Vertical sleepers:
- Maximum 600mm retained height safely DIY
- Beyond 600mm: engineering recommended or required
- Simple garden beds only
- Assumes good soil, no surcharge, adequate drainage
Horizontal stacked (with posts):
- Maximum 800mm-1m retained height DIY (carefully)
- Proper technique essential (footings, posts, drainage)
- Concrete sleepers DIY-friendlier than timber this height
- Beyond 1m: engineering required most jurisdictions
Critical factors affecting limits:
- Soil type (clay worse than sand—higher lateral pressure)
- Drainage (poor drainage reduces safe height significantly)
- Surcharge (driveway, building, or slope above reduces safe height)
- Wall length (longer walls more critical than short sections)
When Engineering Required
Legal requirements (varies by jurisdiction):
- Most councils require engineering walls over 1m retained height
- Many require engineering all retaining walls (check local council)
- Walls near boundaries often require engineering regardless of height
- Surcharge conditions trigger engineering requirements
Engineering provides:
- Structural calculations (post size, spacing, footing requirements)
- Drainage specifications
- Construction drawings (builder reference)
- Certification (council approval, future sale documentation)
Engineering costs:
- Simple residential wall: $800-2,000
- Complex wall (high, long, difficult site): $2,000-5,000+
- Essential investment safety and compliance
- Protects against failure and liability
When to engage engineer even if not legally required:
- Walls 800mm+ height (approaching limits)
- Clay soils or poor drainage
- Critical walls (failure consequences expensive)
- Surcharge present (vehicles, structures above)
- Any uncertainty about DIY capacity
Peninsula Clay Soil Considerations
Reactive clay challenges:
- Higher lateral pressure (moisture causes expansion)
- Seasonal movement (wet/dry cycles)
- Drainage critical (water pressure accelerates failure)
- Conservative height limits (clay more demanding than sand)
Recommendations Peninsula clay:
- Limit DIY to 500mm or less (more conservative than sandy soils)
- Engage engineer walls 600mm+ (clay specialist experience valuable)
- Exceptional drainage essential (cannot over-engineer drainage clay)
- Consider alternative materials (gabions excellent clay drainage)
Drainage: Non-Negotiable Requirement
Water pressure causes retaining wall failure more than any other factor.
Why Drainage Critical
What happens without drainage:
- Water accumulates behind wall (rainfall, irrigation, groundwater)
- Hydrostatic pressure builds (water weight pushes wall)
- Pressure exceeds wall strength (failure, bulging, collapse)
- Saturated soil increases load (heavier when wet)
- Timber particularly vulnerable (moisture accelerates rot)
All retaining walls require drainage:
- Regardless of height (even 300mm garden beds)
- All materials (timber and concrete both need drainage)
- No exceptions (drainage never optional)
- Cheap insurance (prevents expensive failure)
Essential Drainage Elements
Agricultural pipe (ag pipe, slotted drainage pipe):
- 100mm diameter minimum
- Placed at base of wall (behind and beneath sleepers)
- Surrounded by gravel
- Outlets to suitable drainage point (stormwater, swale, or natural fall)
- Collects and directs groundwater away from wall
Gravel backfill zone:
- 300mm width minimum behind wall (wider better)
- Full height of wall
- Drainage aggregate (7mm or 14mm blue metal, crusher dust, or drainage gravel)
- Allows water to drain to ag pipe instead of pooling against wall
- Clay soils: 400-500mm width (even more critical)
Weep holes:
- Through wall at base
- Every 1-2 metres spacing
- 50-75mm PVC pipe or similar
- Allows water to escape through wall face
- Prevents pressure buildup
Top drainage:
- Grade soil away from top of wall
- Prevents surface water flowing into wall
- Simple swale or surface grading
- Often overlooked but important
For critical detailed guidance on drainage design and common mistakes that cause wall failure, see our comprehensive guide on retaining wall drainage: stop blowouts.
Peninsula Drainage Challenges
Clay soil specifics:
- Holds moisture longer (persistent pressure)
- Poor natural drainage (water doesn’t disperse easily)
- Requires larger gravel zones (400-500mm width)
- Ag pipe outlets critical (must actually drain to somewhere—not into more clay)
- Subsoil drainage may be necessary (ag pipe below wall as well)
High rainfall winters:
- Melbourne and Peninsula: May-October wet season
- Persistent saturation (months of groundwater pressure)
- Drainage design must handle worst-case sustained loading
- Spring and autumn: most critical test (saturated ground)
Concrete vs Timber: When Each Wins
Strategic material selection matching circumstances.
Choose Concrete Sleepers When:
Long-term permanent solution desired:
- 40-60+ year lifespan justifies higher initial investment
- No replacement planned lifetime
- Set-and-forget preference
Coastal Peninsula properties:
- Salt air accelerates timber deterioration
- Humidity promotes rot
- Concrete unaffected coastal conditions
- Proven permanent solution
Clay soil or poor drainage sites:
- Constant moisture destroys timber
- Concrete impervious to water
- Eliminates rot concern
- Better investment challenging sites
Low-maintenance priority:
- No termite inspections
- No oiling or treatment
- Minimal ongoing attention
- Busy homeowners or investment properties
Higher walls (over 600mm):
- Structural consistency (engineering calculations reliable)
- Longer lifespan justifies investment taller walls
- Failure consequences more expensive (concrete reduces risk)
Modern or contemporary properties:
- Clean uniform appearance suits contemporary architecture
- Timber-look concrete options available
- Professional neat aesthetic
Choose Timber Sleepers When:
Budget limited:
- Treated pine cheapest upfront
- Acceptable short-to-medium term (10-15 years)
- Replacement acceptable future cost
Low walls (under 600mm):
- Lifespan less critical (lower replacement cost)
- Aesthetic benefit higher (visible low walls)
- DIY-manageable weight
Natural aesthetic critical:
- Heritage or cottage gardens
- Warm timber character desired
- Property style demands natural materials
- Contemporary concrete appearance doesn’t suit
Temporary or interim solution:
- Rental property (short ownership horizon)
- Staged landscaping (may replace later anyway)
- Testing layout before permanent installation
Hardwood available and budget allows:
- Hardwood 25-40 year lifespan (better than treated pine)
- Natural durability (less reliance on chemical treatment)
- Compromise between treated pine and concrete
- Cost comparable concrete (material similar, installation easier)
Material Costs Comparison
Treated pine sleepers:
- $25-45 per sleeper (200x75mm x 2.4m)
- Cheapest upfront
- Replacement 10-15 years doubles long-term cost
Hardwood sleepers:
- $80-150 per sleeper (similar dimensions)
- Mid-range cost
- 25-40 year lifespan (better value than pine)
Concrete sleepers:
- $80-150 per sleeper (various dimensions)
- Similar cost hardwood upfront
- 40-60+ year lifespan (best cost-per-year)
- No maintenance costs
Installation labour:
- Similar costs all materials (concrete weight offset by easier stacking)
- $80-150 per linear metre typical (professional installation simple walls)
- Engineering adds $800-2,000+ if required
Professional Installation vs DIY
Realistic assessment of capabilities and when to hire.
DIY-Achievable Scenarios
Low garden bed walls (under 600mm):
- Vertical sleepers (treated pine or hardwood manageable weight)
- Straight walls (curves harder)
- Good soil (sand or loam, not reactive clay)
- No surcharge (flat grade above)
- Simple drainage (accessible outlet)
Small concrete sleeper walls (under 800mm):
- Interlocking systems (DIY-designed concrete products)
- 2-3 helpers (weight management)
- Level site (foundation preparation easier)
- Short lengths (under 5-6m reduces complexity)
Required DIY skills and tools:
- Post hole digging (post hole shovel or auger)
- Level and string line (accurate levelling)
- Excavation (base preparation and drainage trench)
- Heavy lifting technique (back safety, team coordination)
- Concrete mixing (post footings)
Professional Installation Recommended
When to hire:
- Walls over 800mm height (approaching engineering limits)
- Long walls (over 8-10m length increases complexity)
- Clay soils (Peninsula properties often better professionally done)
- Difficult access (equipment required, excavation challenging)
- Engineering required (engineer often specifies builder or certifies installation)
- Critical walls (driveway, beneath structures, failure consequences expensive)
Professional brings:
- Experience (correct technique prevents costly mistakes)
- Equipment (excavators, compaction, lifting)
- Speed (days not weeks)
- Warranty (reputable installers guarantee work)
- Engineering liaison (familiar with compliance requirements)
Professional costs (typical residential wall):
- Supply and install: $350-600 per linear metre (600mm-1m height, concrete sleepers)
- Timber sleepers: $300-500 per linear metre (similar heights)
- Higher walls: $500-800+ per linear metre (engineering, complexity)
- Includes: excavation, base prep, drainage, sleepers, posts, installation, cleanup
When retaining wall projects demand professional design, engineering, or installation to ensure long-term structural integrity and compliance, partnering with experienced hardscaping specialists prevents the drainage failures, structural inadequacies, and premature deterioration that commonly plague DIY and budget installations. Peninsula Hard Yards delivers engineered retaining wall solutions for Mornington Peninsula properties, with expertise in concrete and timber sleeper installations that manage challenging clay soils and coastal conditions reliably. Disclosure: Peninsula Hard Yards is a professional hardscaping service operating on the Mornington Peninsula. We mention them as a relevant local example for readers seeking specialist retaining wall construction.
Final Thoughts
Sleeper retaining walls offer practical slope management and terracing solutions for Australian residential properties, with material choice between concrete and timber fundamentally determining long-term performance, maintenance requirements, and cost-effectiveness over ownership periods measured in decades.
Material selection framework:
- Concrete sleepers: Long-term permanent solution, coastal and clay soil ideal, low-maintenance, higher initial cost justified by 40-60+ year lifespan
- Timber sleepers: Natural aesthetic, lighter DIY-friendlier weight, lower initial cost (treated pine), but 10-20 year lifespan requires eventual replacement
Cost-per-year reality: Concrete sleepers deliver lowest long-term cost despite higher upfront investment—$80-150 per sleeper across 50 years versus treated pine $25-45 per sleeper replaced every 12-15 years. Hardwood timber ($80-150) offers compromise at similar cost to concrete but 25-40 year lifespan still shorter.
Height limitations:
- DIY safe: under 600mm (vertical sleepers) or 800mm (horizontal stacked with proper technique)
- Professional recommended: 800mm-1m (approaching engineering requirements)
- Engineering essential: over 1m, surcharge present, poor soils, or council requirements
Drainage non-negotiable: All retaining walls require agricultural pipe at base, 300mm+ gravel backfill zone, and weep holes regardless of height or material. Water pressure causes more failures than structural inadequacy. Peninsula clay soils demand exceptional drainage—cannot be over-engineered.
Melbourne and Peninsula considerations:
- Coastal salt air: concrete unaffected, timber life reduced (8-15 years treated pine typical)
- Clay soils: constant moisture destroys timber, concrete unaffected (better investment clay)
- High rainfall winters: drainage design must handle sustained saturation (May-October)
- Conservative height limits: clay soils reduce safe DIY heights (500mm maximum conservative)
Strategic installation approach:
- Low garden beds (under 600mm): DIY achievable with care, material choice based on aesthetic and budget
- Medium walls (600-1000mm): professional recommended, engineering often required, concrete better investment
- High walls (over 1m): engineering mandatory, professional installation essential, material specified by engineer
Quality over false economy: Cheap treated pine walls in coastal Peninsula clay soils fail 8-12 years, requiring complete reconstruction. Concrete sleepers installed properly with excellent drainage serve 40-60+ years maintenance-free, justifying higher upfront investment through eliminated replacement costs and peace of mind.
Successful sleeper retaining wall projects match material characteristics to site conditions, respect height limitations requiring engineering, implement comprehensive drainage, and honestly assess DIY capability versus professional installation benefits. Strategic choices create functional, durable, compliant terracing that manages residential slopes and garden levels effectively throughout decades of Melbourne weather, Peninsula clay soil challenges, and coastal exposure without premature failure or expensive reconstruction.
Need a Hand?
Professional lawn and garden services when you need them. Get a quote from our trusted Peninsula partners.
Contact Mowing Magic or Peninsula Hard Yards →Disclosure: We share links to related local services that serve our readers in the Peninsula area.