Decking Ideas Australia: Layouts & Materials
Practical decking layouts for Australian homes: L-shaped, multi-level, floating decks, and material choices from hardwood to treated pine. Understand bushfire zones, climate considerations, and design approaches that work.
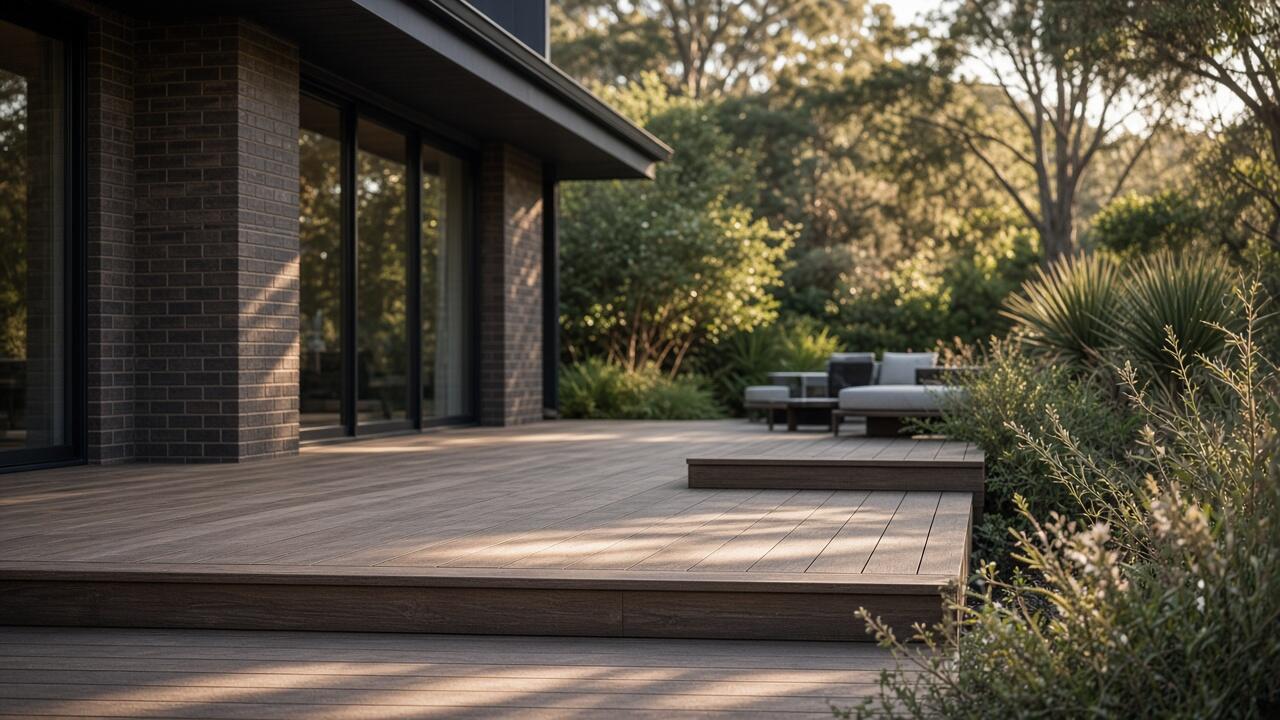
Australian outdoor living centres on the deck—an extension of interior space that connects home to garden, accommodates entertaining, and captures sun, shade, and views throughout the year. Yet deck design extends beyond timber selection: layout configurations, level transitions, orientation, and bushfire compliance shape how effectively decks serve their outdoor living purpose.
Single-level rectangular decks suit many properties, but L-shaped configurations wrap corners to follow sun, multi-level designs manage sloped sites elegantly, and floating low-level decks blur boundaries between garden and living space. Understanding which layout suits your site, how material choices affect longevity and maintenance, and what Australian conditions demand helps create functional, beautiful outdoor spaces that enhance daily living.
Classic Deck Layouts
Proven configurations that suit most Australian homes.
Single-Level Platform Deck
What it is:
- Simple rectangular or square deck
- Single height level
- Attached to house (typical) or freestanding
- Most common and economical design
- Straightforward construction
Advantages:
- Lowest cost (simple structure, minimal materials)
- DIY-friendly (straightforward construction)
- Fast installation
- Versatile furniture arrangement
- Works for flat sites
Ideal for:
- Budget-conscious projects
- Flat sites (minimal height transition)
- Small to medium outdoor spaces
- First-time deck builders (DIY)
- Simple entertaining and living needs
Typical sizes:
- 4x4m (16m²): minimum practical entertaining space for 6-8 people
- 5x5m (25m²): comfortable family entertaining
- 6x6m (36m²): generous outdoor room
- Custom dimensions matching house proportions
L-Shaped Deck
What it is:
- Deck wraps around building corner
- Two wings at right angles
- Often follows sun path or room access
- Creates distinct zones within deck space
- Popular renovation addition (extends existing deck)
Advantages:
- Maximises usable space (utilises two sides of building)
- Creates sun and shade zones (morning sun one wing, afternoon another)
- Defines activity areas (dining one section, lounging another)
- Follows indoor room layout (connects to multiple rooms)
- Increases street appeal (wraps corner visibly)
Design considerations:
- Corner detail important (mitred corner or feature element)
- Different orientations create microclimates (sun/shade timing varies)
- Furniture zoning natural (L-shape suggests distinct areas)
- One wing often larger (primary entertaining space)
- Structural complexity moderate (corner framing)
Ideal for:
- Corner sites or homes with two accessible sides
- Properties wanting sun-tracking (follow sun through day)
- Creating distinct outdoor zones (dining + lounging)
- Sloped sites (one wing can step down)
- Maximising limited yard space
Peninsula considerations:
- South-west wind protection (one wing shelters other)
- Follow sun north and west (typical L orientation)
- Coastal view properties (one wing view, one wing sheltered)
- Corner wrapping enlarges perceived space on smaller blocks
Multi-Level Deck
What it is:
- Multiple deck platforms at different heights
- Steps transition between levels
- Follows sloped site or creates visual interest flat sites
- Defines zones through level changes
- More complex structure and higher cost
Advantages:
- Elegant slope management (avoid tall single-level with exposed structure)
- Creates natural zoning (levels define activity areas)
- Visual interest (breaks up large expanses)
- Reduces apparent height (incremental steps gentler than one large drop)
- Follows natural site contours
Level change strategies:
- 300-450mm steps: comfortable single-step transitions between zones
- 600-900mm drops: create distinct platform levels, require railings
- Graduated terracing: multiple small steps down slope
- Sunken lounge areas: lower level creates intimate space
- Elevated viewing platforms: raised section captures views
Ideal for:
- Sloped sites (natural terracing solution)
- Large deck areas (visual interest through level variation)
- Creating distinct zones (dining elevated, lounging lower)
- Properties with elevated views (stepped platforms capture different vantage points)
- Contemporary architecture (multi-level suits modern design)
Complexity and cost:
- 30-50% more expensive than single-level equivalent area
- Requires engineering (structural complexity)
- Professional installation recommended
- More complex furniture placement
- Worth investment sloped sites (alternative retaining walls possibly more expensive)
For comprehensive material comparison including hardwood, treated pine, and composite options, see our detailed guide on timber vs composite decking for Melbourne.
Modern Deck Configurations
Contemporary approaches to deck design.
Floating Deck (Low-Level Ground Deck)
What it is:
- Low-height deck (typically under 400mm above ground)
- Often appears to “float” on landscape
- May not attach to house (freestanding)
- Minimal substructure visible
- Blurs boundary between garden and deck
Advantages:
- No railings required (under 1m height in most jurisdictions—check local codes)
- Lower cost (less structural complexity, no balustrade)
- Intimate connection to garden
- Contemporary minimal aesthetic
- Can relocate (freestanding designs)
- DIY-achievable (simpler than elevated decks)
Design approaches:
- Stepping pads: multiple small floating platforms through garden
- Ground-level extensions: flow directly from interior floor level
- Garden islands: decks within planted areas
- Path integration: deck segments link paved paths
Ideal for:
- Flat sites (minimal height above ground)
- Contemporary homes (clean minimal aesthetic)
- Small gardens (maximise usable space without railings)
- Outdoor lounging (close to grass and planting)
- DIY projects (relatively simple construction)
Limitations:
- Flat sites only (elevated sites need proper decks)
- Limited elevation (views not captured)
- Ground moisture proximity (requires excellent drainage)
- Not suitable bushfire zones (low decks accumulate ember debris)
Wraparound Deck
What it is:
- Deck extends around multiple sides of building
- Can be full perimeter or three sides
- Often includes varying widths (wider primary entertaining area)
- Multiple access points from interior
- Substantial structure and investment
Advantages:
- Maximises outdoor living space
- Creates sun-tracking opportunity (move around deck following sun/shade)
- Multiple entry/exit points
- Dramatic architectural statement
- Captures views multiple directions
Design strategies:
- Primary wide deck (entertaining area) with narrower walkway extensions
- Consistent width all sides (grand statement, expensive)
- Level variations (some sections elevated, others ground-level)
- Partially roofed sections (verandah integration)
Best for:
- Large properties with budget for substantial deck investment
- Homes on acreage or large blocks
- Properties with 360-degree views or sun access
- Heritage verandah replacement (contemporary interpretation)
- Architectural statement projects
Elevated Deck (High-Level)
What it is:
- Deck significantly elevated above ground (1.5m+ typical)
- Requires substantial substructure and railings
- Often second-storey access to living areas
- Captures views over fences and vegetation
- Structural engineering essential
Advantages:
- Captures elevated views (over neighbours, towards landscape)
- Matches upstairs living areas (contemporary open-plan homes)
- Breeze access (above fence line)
- Privacy from neighbours (elevation advantage)
- Dramatic architectural feature
Requirements:
- Engineering certification (structural loads, wind, footings)
- Compliance railings (1m height minimum above deck)
- Proper flashing (connection to building weather-sealed)
- Access stairs or internal access
- Professional construction essential
Cost implications:
- 50-100% more expensive per square metre than low-level deck
- Substructure dominates cost
- Railings add $200-500 per linear metre
- Engineering fees $1,500-5,000+
- Justified when elevation captures significant views or matches upstairs living
Material Considerations by Layout
Layout configurations influence material choice priorities.
Large Single-Level Decks
Material priorities:
- Visual consistency important (large expanses show board variation)
- Quality hardwood or premium composite (large area justifies investment)
- Consistent board lengths (minimise joins)
- Colour uniformity (large areas show batch variation)
Suitable materials:
- Spotted Gum or Blackbutt hardwood (consistent colour, good availability)
- Premium capped composite (fade resistance across large sun-exposed areas)
- Avoid: treated pine large decks (weathering inconsistent, short life)
Multi-Level and Complex Layouts
Material priorities:
- Workability matters (cutting angles, level transitions)
- Visual consistency less critical (level changes distract from board variation)
- Cost control important (complex layouts use more material)
Suitable materials:
- Mid-range hardwood (Merbau acceptable, cost-effective)
- Budget-to-mid composite (capped adequate for complexity)
- Treated pine possible (covered or shaded sections)
Floating and Low-Level Decks
Material priorities:
- Ground proximity demands durability
- Moisture resistance critical (close to soil and grass)
- Cost-effective appropriate (often smaller areas)
Suitable materials:
- Naturally durable hardwood (Ironbark, Tallowwood)
- Treated hardwood
- Premium composite (moisture resistance)
- Avoid: unsealed treated pine (ground moisture accelerates decay)
Bushfire-Rated Decking
Critical consideration for many Australian properties.
BAL Zones and Deck Requirements
What BAL means:
- Bushfire Attack Level (BAL): rating system measuring bushfire risk
- BAL-Low: minimal risk, no special requirements
- BAL-12.5 and above: increasing restrictions on materials and design
Deck implications by BAL rating:
BAL-Low:
- No restrictions
- Any decking material acceptable
- Standard design approaches
BAL-12.5:
- Limits on timber species and dimensions
- Larger board sections required (less surface area to char)
- Gaps between boards restricted (prevent ember penetration)
- Some composites acceptable (check approvals)
BAL-19, BAL-29, BAL-40:
- Increasing restrictions
- Some timber species prohibited
- Composite generally not acceptable (melts/ignites)
- Metal substructure required
- Non-combustible decking (steel, aluminium) may be mandated
- Deck design affects building compliance
BAL-FZ (Flame Zone):
- Most timber and composite prohibited
- Non-combustible materials only
- Deck design significantly constrained
Bushfire-Safe Deck Strategies
Material selection:
- High-density hardwoods better than softwood (Ironbark, Spotted Gum)
- Larger dimensions better than thin boards (120x32mm better than 90x19mm)
- Avoid treated pine (ignites readily)
- Check species BAL approval lists
Design approaches:
- Minimise underside ember accumulation (enclose deck base or use non-combustible shielding)
- Sealed tight joints (prevent ember entry)
- Metal mesh or non-combustible barriers
- Avoid low-level floating decks (ember trap)
- Integration with overall building bushfire protection
Compliance:
- Engineer or bushfire consultant required
- Certification essential insurance and council approval
- Specify BAL-rated products explicitly
- Document compliance (future sale requires proof)
For broader deck design context including raised, ground-level, and wraparound configurations, see our guide on deck ideas for Australian homes.
Orientation and Climate
Australian sun and weather patterns shape deck functionality.
Sun and Shade Considerations
North-facing decks (Australia):
- Maximum sun exposure
- Ideal winter warmth
- Can be too hot summer (shade structure recommended)
- Best for year-round outdoor living
- Most popular orientation
East-facing decks:
- Morning sun (breakfast, coffee)
- Shade by afternoon (comfortable summer)
- Captures sunrise
- Cooler overall
West-facing decks:
- Afternoon and evening sun
- Hot summer afternoons (intense heat)
- Ideal sunset entertaining
- Often requires shade (pergola, sail)
South-facing decks:
- Limited sun (shaded most of day)
- Cooler year-round
- Suitable hot climates only
- Generally avoid Melbourne climate (insufficient sun)
Peninsula wind:
- South-west prevailing wind (cooler months)
- North-east sea breeze (summer)
- Orientation affects wind exposure
- Screens or planting windbreaks improve usability
Drainage and Weather Protection
Deck drainage:
- All decks require fall (1-2% grade away from building)
- Board spacing allows water drainage (4-6mm gaps typical)
- Elevated decks: ensure underside drainage (prevent pooling on ground)
- Low-level decks: soil drainage critical (prevent moisture damage)
Melbourne rainfall:
- Sealed deck boards better (prevents water penetration)
- Drainage under deck important (Peninsula clay soils retain moisture)
- Flashing critical (prevent water entering building)
- Annual cleaning removes debris and prevents blockages
Layout and Furniture Planning
Functional deck design accommodates furniture and movement.
Space Allocation
Dining area:
- Minimum 3x3m (eight-person table and chairs with circulation)
- 3.5x3.5m comfortable (easier chair movement)
- 4x4m generous (sideboard or serving area)
- Position near kitchen/dining door (food transport)
Lounging area:
- Minimum 2.5x2.5m (small lounge setting)
- 3x3m comfortable (standard outdoor lounge suite)
- 4x3m generous (large modular lounge)
- Consider sun position (afternoon lounge popular)
BBQ and prep zone:
- Minimum 2.5x1.5m (BBQ and small prep counter)
- 3x2m comfortable (BBQ, prep space, circulation)
- Position with kitchen access (practical) and wind consideration (smoke direction)
Circulation:
- 1m+ pathways between furniture zones
- 1.5m main circulation routes
- Avoid narrow bottlenecks
- Door swing clearances
Typical functional deck sizes:
- 4x4m (16m²): minimal—dining OR lounging, not both generously
- 5x5m (25m²): comfortable—dining and small lounge
- 6x6m (36m²): generous—full dining, lounging, BBQ zones
- 7x5m (35m²+): L-shape or multi-zone layouts natural
Design Integration
Indoor-outdoor flow:
- Deck level matching interior floor ideal (seamless transition)
- Large sliding/folding doors maximise connection
- Deck width should exceed door width (avoid bottleneck)
- Sightlines from interior (deck as extended living view)
Garden integration:
- Steps to lawn or garden (don’t isolate deck)
- Planting around deck softens structure
- Container gardens on deck blend boundaries
- Consider garden views from deck furniture positions
Cost Planning by Layout
Realistic budget expectations for different deck configurations.
Single-Level Deck Costs (25m² example)
Treated pine:
- Materials: $1,200-1,800
- Installation: $2,500-4,500
- Total: $3,700-6,300 ($150-250/m²)
Hardwood (Spotted Gum):
- Materials: $2,000-2,800
- Installation: $3,000-5,000
- Total: $5,000-7,800 ($200-310/m²)
Composite (premium):
- Materials: $4,000-5,500
- Installation: $3,000-5,000
- Total: $7,000-10,500 ($280-420/m²)
L-Shaped Deck (30m² example, 20% premium over simple rectangle)
Hardwood:
- Total: $6,500-10,000 ($215-330/m²)
- Complexity adds labour and wastage
Composite:
- Total: $9,000-13,000 ($300-430/m²)
Multi-Level Deck (30m² example, 40% premium over single-level)
Hardwood:
- Total: $7,500-11,500 ($250-380/m²)
- Engineering, additional framing, steps
Composite:
- Total: $10,500-15,000 ($350-500/m²)
Elevated High-Level Deck (25m², 60% premium plus railings)
Hardwood:
- Materials: $3,200-4,500
- Installation: $5,000-8,000 (includes engineering, substructure)
- Railings: $2,500-4,000
- Total: $10,700-16,500 ($430-660/m²)
Cost drivers elevated decks:
- Engineering fees ($1,500-4,000)
- Substantial substructure (posts, beams, bracing)
- Balustrade compliance (essential safety, expensive)
- Access stairs
- Weather protection (flashing complexity)
Permits and Compliance
Australian building regulations and council requirements.
When Permits Required
Generally require building permit:
- Decks over 1m above ground
- Attached to building (structural connection)
- Coastal areas (many Peninsula councils)
- Bushfire zones (BAL-rated areas)
- Heritage overlays
- Large areas (varies by council, typically over 10m²)
May not require permit:
- Low-level detached decks (under 1m, not attached)
- Small areas (under 10m² some councils)
- Temporary or moveable structures
- Check your specific council (regulations vary)
Engineering certification:
- Elevated decks (over 1m)
- Large spans
- Unusual designs
- Bushfire zones
- Required for permit approval
Common Compliance Issues
Balustrade heights:
- 1m minimum above finished deck level
- Spacing between balusters (no more than 125mm gaps—child safety)
- Structural strength requirements
- Non-climbable designs (young children)
Setbacks and boundaries:
- Distance from property boundaries varies by council
- Overlooking neighbours (privacy concerns)
- Height restrictions
- Heritage and character area constraints
Weather protection:
- Flashing where deck meets building
- Waterproofing under decks above habitable rooms
- Drainage away from building
Final Thoughts
Successful deck design balances layout configuration with site conditions, material selection, budget realities, and Australian climate requirements to create functional, beautiful outdoor living spaces that enhance daily use and property value.
Layout selection:
- Single-level platform: Budget-friendly, DIY-achievable, suits flat sites and simple needs
- L-shaped: Maximises space, sun-tracking, distinct zones, moderate complexity
- Multi-level: Elegant slope solution, visual interest, defines zones, higher cost
- Floating low-level: Contemporary minimal, intimate garden connection, flat sites only
- Elevated: Captures views, upstairs access, significant investment, engineering required
Material strategy by layout:
- Large simple decks: invest in quality materials (visual consistency matters)
- Complex layouts: mid-range materials acceptable (complexity distracts from board variation)
- Low-level decks: prioritise durability (ground moisture exposure)
- Elevated decks: balance cost with longevity (structural investment deserves quality decking)
Orientation priorities:
- North-facing: maximum usability, year-round favourite
- East-facing: morning sun, cooler afternoons (summer advantage)
- West-facing: evening entertaining, hot summer afternoons (shade structure recommended)
- Avoid south-facing (Melbourne climate insufficient sun)
Bushfire compliance:
- Check property BAL rating before planning
- BAL-12.5+: material and design restrictions apply
- High-density hardwoods better than softwood and composite
- Engineering and certification essential
- Compliance affects insurance and sale
Functional sizing:
- 4x4m (16m²): minimum practical entertaining space
- 5x5m (25m²): comfortable family deck
- 6x6m+ (36m²+): generous outdoor room with defined zones
- Add 20-30% for L-shape or multi-level equivalent usable space
Cost expectations:
- Treated pine: $150-250/m² (low-budget, shorter life)
- Hardwood: $200-330/m² (mid-premium, Australian favourite)
- Premium composite: $280-500/m² (low-maintenance premium)
- Add 20-40% for complex layouts (L-shape, multi-level)
- Add 50-100% for elevated decks (substructure and engineering)
Peninsula and Melbourne considerations:
- South-west wind exposure (screens, planting, or layout protection)
- Clay soil requires proper drainage (prevent ground moisture damage)
- Coastal properties: corrosion-resistant fixings essential (316 stainless steel)
- Seal timber annually or accept natural weathering (Melbourne rainfall and humidity)
- Check council requirements (coastal areas often stricter)
Planning sequence:
- Assess site (slope, orientation, access, views)
- Determine primary use (entertaining, lounging, family play)
- Choose layout matching site and needs
- Select materials (budget, maintenance, aesthetics)
- Check compliance (permits, BAL rating, engineering)
- Professional design recommended (complex layouts, elevated decks)
Australian deck design succeeds when layout configuration matches site topography, orientation captures climate advantages, materials balance budget with longevity, and scale accommodates intended use. Strategic planning creates outdoor living spaces that function beautifully throughout our distinctly Australian seasons whilst managing bushfire risk, weather exposure, and maintenance requirements that shape long-term satisfaction and property value contribution.
Need a Hand?
Professional lawn and garden services when you need them. Get a quote from our trusted Peninsula partners.
Contact Mowing Magic or Peninsula Hard Yards →Disclosure: We share links to related local services that serve our readers in the Peninsula area.