Subsoil Drainage for Clay Peninsula Soils
Understand subsoil drainage systems for Peninsula clay blocks. Learn when agricultural pipe networks essential, how they work, DIY versus professional installation, and avoiding wet boggy yards.
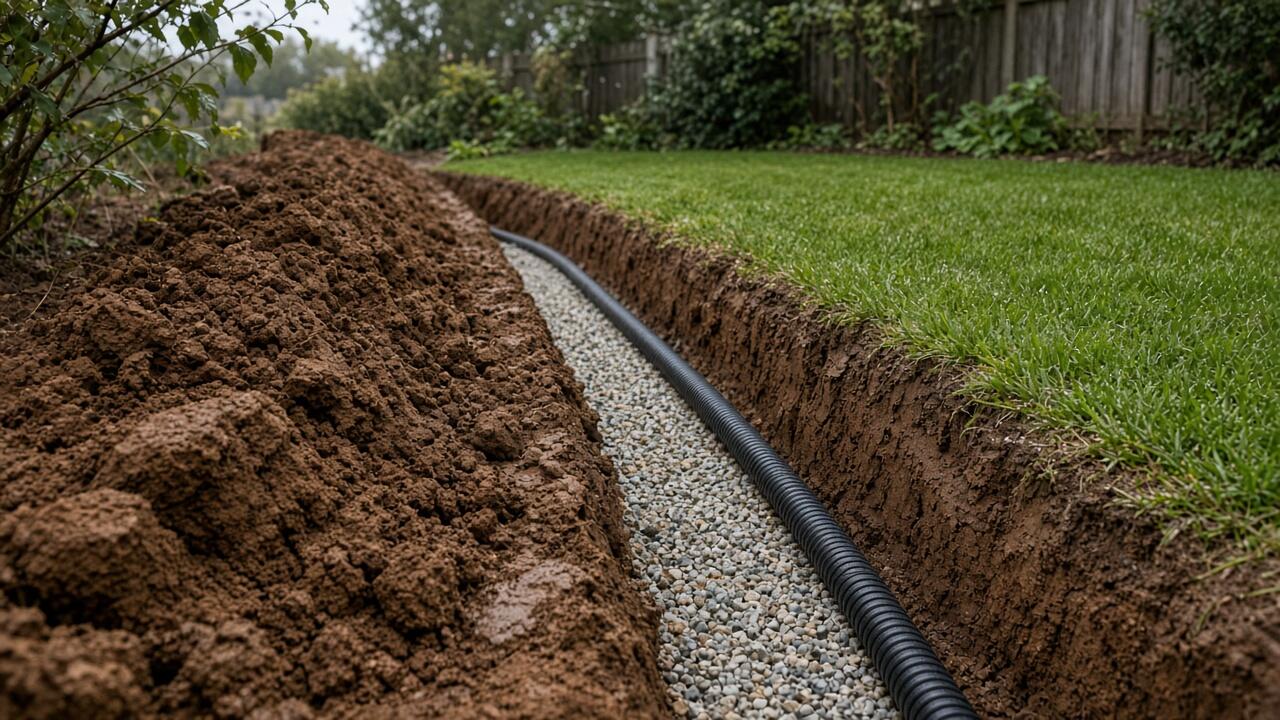
Peninsula properties built on heavy clay soils frequently suffer persistent waterlogging, boggy patches, and saturated ground that remains wet long after rain stops. Surface drainage—grading, swales, and stormwater connections—handles rainfall runoff, but water infiltrating into clay subsoil has nowhere to drain naturally. Clay’s impermeability traps this water underground, creating sodden conditions that kill plants, prevent lawn establishment, undermine retaining walls, and make outdoor spaces unusable for extended winter periods.
Subsoil drainage systems solve these problems through networks of slotted agricultural pipe buried throughout affected areas. These pipes collect water from saturated subsoil layers and channel it away to suitable outlets, effectively dewatering property areas that would otherwise remain waterlogged. Unlike surface drainage dealing with immediate rainfall runoff, subsoil drainage tackles the harder problem of groundwater accumulation within impermeable clay profiles.
Understanding what subsoil drainage is, how ag pipe systems function, when they’re essential versus optional, and realistic DIY capabilities versus professional requirements helps Peninsula property owners determine appropriate solutions for their waterlogged blocks and whether tackling installation themselves or hiring drainage contractors delivers better outcomes.
What Subsoil Drainage Is
Distinguishing between surface and subsurface water management clarifies when subsoil drainage necessary.
Surface vs Subsoil Water
Surface drainage:
- Handles rainfall runoff (water flowing across ground)
- Grading directs water away from buildings
- Swales, channels, and grates collect flow
- Stormwater pipes convey to council drains
- Immediate response (rainfall to drainage within minutes/hours)
Subsoil drainage:
- Handles water within soil profile (underground)
- Infiltrated rainfall trapped in clay layers
- Water accumulates over days/weeks
- Creates saturated soil conditions
- Requires buried pipe networks to extract
Why both needed: Surface drainage alone won’t solve clay waterlogging. Water infiltrating into impermeable clay creates underground saturation that surface grading can’t address. Proper drainage strategy combines surface management (handles immediate rainfall) with subsoil systems (dewater saturated ground).
How Clay Holds Water
Peninsula clay characteristics:
- Fine particle size (poor drainage)
- High plasticity (swells when wet)
- Virtually impermeable (water doesn’t infiltrate downward)
- Creates perched water tables (water sits at clay surface)
- Seasons matter (winter wet, summer dry)
Water accumulation mechanism:
- Rainfall infiltrates initial few centimetres
- Hits impermeable clay layer
- Can’t drain downward or laterally
- Accumulates in soil profile
- Saturates root zone and surface layers
- Remains until evaporation removes (weeks to months)
Problems created:
- Boggy ground (unusable lawn and garden areas)
- Plant death (roots suffocate in saturated soil)
- Mosquito breeding (standing water)
- Structural issues (undermined foundations, retaining walls)
- Mud and access problems (vehicles, foot traffic)
Agricultural Pipe Function
What ag pipe does:
- Slotted or perforated pipe buried in gravel-filled trenches
- Collects water seeping from saturated soil
- Channels water to drainage outlet
- Lowers water table in surrounding area
- Creates “dry” zone within otherwise wet soil
How it works:
- Water seeps through gravel into pipe slots
- Gravity carries water along pipe gradient
- Outlets at lower elevation (daylight or stormwater)
- Continuous removal prevents water accumulation
- Zone of influence: 2-5m either side of pipe (soil dependent)
Network design:
- Parallel trenches across affected area (herringbone pattern typical)
- 3-8m spacing (closer in heavy clay)
- All pipes drain to collector pipe
- Collector outlets to suitable discharge point
- Gradient minimum 1:100 (preferably 1:80 to 1:60)
When Subsoil Drainage Essential
Not all waterlogged properties require subsoil drainage—some benefit from simpler surface solutions.
Indicators You Need Subsoil Drainage
Persistent waterlogging:
- Ground remains boggy days after rain stops
- Water pools in low areas with no surface outlet
- Lawn dies or won’t establish (waterlogged roots)
- Garden beds too wet for most plants
- Spring bulbs and perennials rot
Soil characteristics:
- Heavy clay soil (handful forms sticky ball when squeezed)
- Poor natural drainage (dig 300mm hole, water sits for hours)
- No visible drainage path (flat block or subtle slopes)
- Water table visible (dig 600mm, groundwater appears)
Structural risks:
- Retaining walls show signs of water pressure (bowing, cracking)
- Building foundations affected (rising damp, cracking)
- Paving or driveways subsiding (saturated base unstable)
- Existing drainage systems overwhelmed
Seasonal patterns:
- Winter waterlogging (May through September typical Peninsula)
- Improves summer but returns every winter
- Getting worse over time (compaction, reduced infiltration)
When Surface Drainage Sufficient
Simpler solutions work:
- Water drains within 24-48 hours of rain
- Clear surface flow paths available
- Problem localised to obvious low spots
- Grading or swales would address issue
- Sandy or loamy soils (drain naturally)
Try first (before subsoil):
- Improve surface grading (falls away from buildings)
- Install surface drains (grates, channels)
- Create swales (shallow vegetated channels)
- Connect obvious pooling to stormwater
- Improve compacted soil (gypsum, organic matter, aeration)
Peninsula sandy soils:
- Coastal Peninsula: often sandy
- Drains naturally (rarely needs subsoil drainage)
- Surface management usually adequate
- Inland Peninsula: more clay (subsoil drainage commonly needed)
For comprehensive guidance on diagnosing drainage problems and implementing surface solutions, see our guide on garden drainage fixes for wet Victorian yards.
Subsoil Drainage System Design
Proper design ensures effective water removal throughout affected areas.
Ag Pipe Specifications
Pipe type:
- 100mm (4 inch) diameter typical residential
- Slotted ag pipe (slots, not perforations)
- PVC or polyethylene material
- Flexible corrugated for following contours
- UV-resistant if any sections exposed
Slot orientation:
- Slots facing DOWN or sideways (critical)
- Never upward-facing (silt clogs immediately)
- Downward preferred (less clogging risk)
- Common mistake that ruins drainage effectiveness
Gravel surround:
- Pipe fully encased in free-draining gravel
- 100-150mm gravel below, beside, above pipe
- 10-20mm blue metal or crushed rock
- Clean aggregate (minimal fines)
- Creates drainage zone water can reach
Geotextile fabric:
- Wraps gravel zone completely
- Prevents soil migration into gravel (clogging)
- Non-woven landscape fabric
- Overlap joins 300mm minimum
- Essential component, not optional
Trench Layout
Herringbone pattern typical:
- Parallel lateral trenches across area
- All drain to central collector pipe
- Collector outlets to discharge point
- Like fish skeleton (hence “herringbone”)
Trench spacing:
- Heavy clay: 3-5m centres
- Moderate clay: 5-8m centres
- Zone of influence: approximately 2-5m each side
- Closer spacing = better drainage = more cost
- Balance effectiveness and budget
Trench depth:
- 450-600mm typical residential
- Below root zone (300mm minimum)
- Above bedrock or impermeable layers
- Gradient maintained (minimum 1:100 fall)
Trench width:
- 200-300mm wide adequate
- Wider easier for pipe and gravel placement
- Narrower minimises excavation and backfill
- Machinery access may determine width
Outlet Requirements
Must outlet somewhere useful:
- Daylight to lower ground (natural surface)
- Stormwater connection (if permitted locally)
- Drainage easement or council drain
- Soakaway pit (sandy soil only, not clay)
- Never terminate in dead end (defeats purpose)
Outlet must be lower than trenches:
- Gravity-fed system (no pumps)
- Minimum 300mm drop from highest pipe to outlet
- Consider seasonal water table (outlet above high water)
- Confirm flow before backfilling trenches
Outlet protection:
- Rodent guard (mesh over pipe end)
- Erosion protection (stone splash pad)
- Mark location (future maintenance access)
- Visible for inspection (confirm flow after rain)
Installation Process
Proper installation technique determines long-term effectiveness.
Excavation
Manual or machinery:
- Small area (under 50m trenching): hand dig feasible
- Large area: mini excavator hire essential ($150-250 per day)
- Trenching attachment speeds work dramatically
- Access considerations (gates, lawn damage)
Setting out:
- Mark trench lines with spray paint
- Check for underground services (Dial Before You Dig)
- Maintain gradient (string line and level)
- Start at outlet, work upslope
Excavation tips:
- Pile topsoil separately (reuse for surface)
- Subsoil can be removed or used elsewhere
- Neat trenches easier to work in
- Depth consistency matters (maintain gradient)
Pipe Installation
Base preparation:
- 100-150mm compacted gravel in trench bottom
- Level and check gradient
- Test with water (should flow to outlet)
Laying pipe:
- Roll out pipe along trench
- Join sections with couplings
- Maintain gradient constantly
- No high points (water traps)
- Slots facing DOWN
Gravel surround:
- Place pipe on gravel base
- Backfill around and over pipe with gravel
- Maintain 100-150mm clearance all sides
- Total gravel thickness: 300-400mm typical
Geotextile wrapping:
- Line trench walls before gravel (or wrap after)
- Complete encasement of gravel zone
- Overlap fabric edges
- Fold over top before soil backfill
Backfilling
Layered approach:
- Topsoil over geotextile (150-200mm)
- Compact gently (don’t crush pipe)
- Mound slightly (settling expected)
- Seed or turf to restore surface
Timing:
- Test system before full backfill (run water through)
- Confirm outlet flow
- Check no leaks or breaks
- Then complete backfilling
DIY vs Professional Installation
Realistic assessment of capability and project scope determines approach.
DIY-Appropriate Situations
When DIY feasible:
- Small area (under 100m total trenching)
- Simple layout (few trenches, straightforward outlet)
- Good physical capability (heavy manual labour)
- Mini excavator hire available and affordable
- Time available (multiple weekends likely)
- Clear outlet location (no complicated engineering)
Required skills:
- Basic excavation and earthworks
- Understanding gradient and levels
- Ability to operate mini excavator (or manual digging stamina)
- Following installation sequence
- Problem-solving (inevitable complications)
Cost savings:
- Materials only: $10-20 per linear metre
- Labour savings: $30-60 per linear metre
- Total DIY: $10-20 per metre vs $40-80 per metre professional
- 50m system: $500-1,000 DIY vs $2,000-4,000 professional
Effort required:
- 50m system: 2-3 full days excavation (mini excavator)
- Plus 1-2 days pipe and gravel installation
- Plus 1 day backfilling
- Total: 4-6 full days labour (2-3 weekends)
Professional Installation Recommended
Complex projects:
- Large area (over 100m trenching)
- Multiple outlets required
- Complicated gradient issues
- Poor soil (rock, very heavy clay, groundwater)
- Retaining wall drainage integration
When professional worthwhile:
- Time constraints (professionals faster)
- Physical limitations (heavy work)
- Risk aversion (mistakes expensive to fix)
- Professional design needed (soil assessment, optimal layout)
- Machinery already on-site (combining with other works)
What professionals provide:
- Site assessment and design
- Machinery and equipment (no hire needed)
- Experience (avoid common mistakes)
- Efficiency (days not weeks)
- Problem-solving (adapt to site conditions)
- Some warranty or guarantee
Professional costs:
- Design/consultation: $300-800 (some waive if installing)
- Installation: $40-80 per linear metre typical
- Machinery and labour included
- Small surcharge for difficult access or conditions
- 50m system: $2,000-4,000 typically
Getting Quotes
Information to provide:
- Property address and photos
- Description of problem (boggy areas, seasonal patterns)
- Site access (gate width, driveway protection)
- Approximate area affected
- Preferred outlet location (if known)
Questions to ask:
- Layout design approach (how many trenches, spacing)
- Gradient and outlet feasibility
- Materials specification (pipe type, gravel, fabric)
- Timeline (days on-site)
- Warranty or guarantee
- References from recent Peninsula jobs
Red flags:
- Quotes without site visit
- Vague material specifications
- Unrealistic timeline (“done in few hours”)
- No discussion of outlet location
- Significantly cheaper than competitors (may cut corners)
Peninsula Clay Considerations
Regional soil and climate affect drainage requirements and design.
Peninsula Clay Types
Inland properties:
- Heavy clay common (Frankston, Mornington, Somerville)
- Poor drainage (subsoil systems often essential)
- Waterlogging winter (May-September typical)
- Requires closer pipe spacing (3-5m centres)
Coastal properties:
- Sandy soils more common (Blairgowrie, Rye, Sorrento)
- Natural drainage better
- Subsoil systems rarely needed
- Surface solutions usually adequate
Transitional zones:
- Clay and sand pockets
- Variable drainage
- May need targeted subsoil drainage (clay pockets only)
- Surface plus selective subsoil approach
Seasonal Patterns
Winter waterlogging:
- Peak rainfall May through September
- Evaporation low (days short, cool temperatures)
- Water accumulates progressively
- Worst conditions July-August typically
Summer recovery:
- Reduced rainfall (though Peninsula winters wetter than inland Melbourne)
- High evaporation (long days, warmth)
- Clay dries and cracks
- Appears “fixed” until next winter
System design implications:
- Size for worst-case (winter saturation)
- Summer dryness doesn’t mean problem solved
- Outlets must function year-round
- Consider seasonal water table variations
Retaining Wall Integration
Walls in clay:
- Subsoil drainage behind walls essential
- Prevents hydrostatic pressure buildup
- Ag pipe at wall base plus backfill
- Often combined with broader site drainage
Network connection:
- Retaining wall ag pipe can connect to site drainage
- Both outlet at same point
- Integrated design more efficient
- Consider during planning phase
For critical guidance on retaining wall drainage requirements regardless of wall material or height, see our comprehensive guide on retaining wall drainage principles.
Common Mistakes
Avoiding typical errors saves time, money, and frustration.
Design Errors
Insufficient gradient:
- Level or reverse-grade pipe doesn’t flow
- Water sits in pipe (defeats purpose)
- Minimum 1:100 essential (preferably steeper)
- Check gradient with spirit level and string line
Wrong pipe orientation:
- Slots facing upward (instant silt clogging)
- Renders system non-functional
- Simple mistake with serious consequences
- Always slots DOWN or sideways
No outlet:
- Pipe goes nowhere (water collects but can’t exit)
- System appears complete but non-functional
- Must terminate at lower elevation or stormwater
- Verify outlet before backfilling
Inadequate gravel:
- Pipe in soil (not gravel)
- Thin gravel layer (insufficient drainage capacity)
- Water can’t reach pipe slots
- Minimum 300mm total gravel thickness essential
Installation Mistakes
Crushed pipe:
- Heavy equipment drives over pipe during backfill
- Collapses pipe, blocks flow
- Protect pipe during construction
- Inspect before burying completely
Forgotten geotextile:
- Saves $50-100
- Soil migrates into gravel (clogs within 5-10 years)
- System lifespan dramatically reduced
- Never omit fabric (false economy)
Poor connections:
- Lateral pipes don’t reach collector
- Joints leak or separate
- High points in pipe (water traps)
- Careful joining and gradient checking essential
Inadequate backfill compaction:
- Loose backfill settles (surface depressions)
- Creates new drainage problems
- Compact in layers
- Accept some settling (mound slightly)
Outlet Issues
Outlet too high:
- Above water table in wet seasons
- Water backs up system
- Can’t drain effectively
- Must be lower than pipe network
Blocked outlet:
- Debris, silt, roots block outlet
- System functional but can’t discharge
- Regular inspection and clearing
- Rodent guard prevents animals nesting
Erosion at outlet:
- Concentrated flow erodes surrounding soil
- Undermines pipe outlet
- Creates new problems
- Stone splash pad prevents erosion
Maintenance
Properly installed subsoil drainage requires minimal ongoing attention.
Regular Checks
Annual inspection:
- Confirm outlet flowing after heavy rain
- Check for ground settling above trenches
- Inspect outlet for blockage
- Walk site looking for new boggy areas
Post-rain observation:
- Ground should drain within 24-48 hours
- Previously boggy areas remain firm
- Outlet discharges during and after rain
- If not working, investigate blockage
Troubleshooting
System not draining:
- Check outlet (blocked or too high?)
- Inspect for crushed or disconnected pipe
- Consider tree root infiltration (if trees nearby)
- May require camera inspection (professional)
Partial effectiveness:
- Some areas still boggy (need additional trenches)
- Pipe spacing too wide for soil type
- Outlets inadequate capacity (need larger collector)
- Add trenches to affected zones
Settling depressions:
- Normal over first year
- Regrade and top up soil
- Compact future backfill better
- Accept minor settling (not structural concern)
Lifespan
Well-installed systems:
- 20-30+ years typical lifespan
- Eventually gravel clogs (silt infiltration)
- Pipe may crush or break (traffic, roots)
- Outlet erodes or blocks
Extending lifespan:
- Quality materials initially
- Proper geotextile installation
- Protect from traffic (avoid driving over)
- Clear outlets annually
- Address tree roots before major infiltration
Final Thoughts
Subsoil drainage systems solve persistent Peninsula clay waterlogging that surface drainage can’t address, using networks of agricultural pipe buried in gravel-filled trenches to collect and remove water trapped within impermeable clay profiles. Properties experiencing boggy conditions lasting days to weeks after rainfall, dying lawns and gardens from waterlogged soil, and structural risks to retaining walls from saturated ground benefit substantially from professionally designed and installed subsoil drainage networks.
When subsoil drainage essential:
- Heavy clay soils (inland Peninsula typical)
- Persistent waterlogging (ground stays wet days after rain)
- Flat blocks with no natural drainage path
- Retaining walls showing water pressure signs
- Lawns and gardens failing from saturation
System components:
- 100mm slotted ag pipe (slots DOWN, never up)
- Complete gravel surround (300-400mm total thickness)
- Geotextile fabric (prevents soil migration into gravel)
- Outlet to lower ground or stormwater (gravity-fed)
- Herringbone pattern (lateral pipes to collector)
Design considerations:
- Pipe spacing: 3-5m centres heavy clay (wider moderate clay)
- Trench depth: 450-600mm typical residential
- Gradient: minimum 1:100 (preferably steeper)
- Outlet: must be lower than entire pipe network
DIY vs professional:
- DIY feasible: small areas (under 100m), simple layouts, mini excavator hire, good capability
- Professional recommended: large areas, complex sites, time constraints, design uncertainty
- Cost comparison: $10-20 per metre DIY vs $40-80 per metre professional
- Effort: 50m system requires 4-6 full days DIY labour
Peninsula-specific factors:
- Inland clay: often requires subsoil drainage
- Coastal sandy: usually surface drainage sufficient
- Seasonal waterlogging: winter wet, summer dry (size for worst case)
- Integrate with retaining wall drainage (combined outlet)
Installation priorities:
- Proper gradient throughout (test with water before backfilling)
- Slots facing down (prevents silt clogging)
- Complete gravel surround with geotextile (system longevity)
- Functional outlet (lower than pipes, protected from blockage)
- Testing before full backfill (confirm flow)
Maintenance minimal:
- Annual outlet inspection (clear blockages)
- Post-rain observation (confirm drainage improved)
- Address settling (top up soil depressions)
- Tree root management (prevent pipe infiltration)
Cost expectations:
- DIY materials: $500-1,000 typical 50m system
- Professional installation: $2,000-4,000 typical 50m system
- Design consultation: $300-800 (often included with installation)
- Long-term value: functional yard vs unusable boggy ground
Subsoil drainage transforms waterlogged Peninsula clay properties from seasonally unusable boggy messes into functional year-round outdoor spaces supporting healthy lawns, gardens, and structures. While surface drainage handles immediate rainfall runoff, subsoil systems tackle the harder problem of groundwater accumulation within impermeable clay—preventing persistent saturation that surface grading alone cannot address. Professional installation ensures proper design, efficient construction, and functional outcomes, whilst capable homeowners can achieve effective DIY results on smaller straightforward projects with careful attention to gradient, materials, and installation sequence.
Need a Hand?
Professional lawn and garden services when you need them. Get a quote from our trusted Peninsula partners.
Contact Mowing Magic or Peninsula Hard Yards →Disclosure: We share links to related local services that serve our readers in the Peninsula area.