Patio Ideas Australia: Layouts That Work
Practical patio design ideas for Australian backyards. Learn about covered vs open options, size planning, climate-appropriate materials, and creating entertainment-friendly layouts.
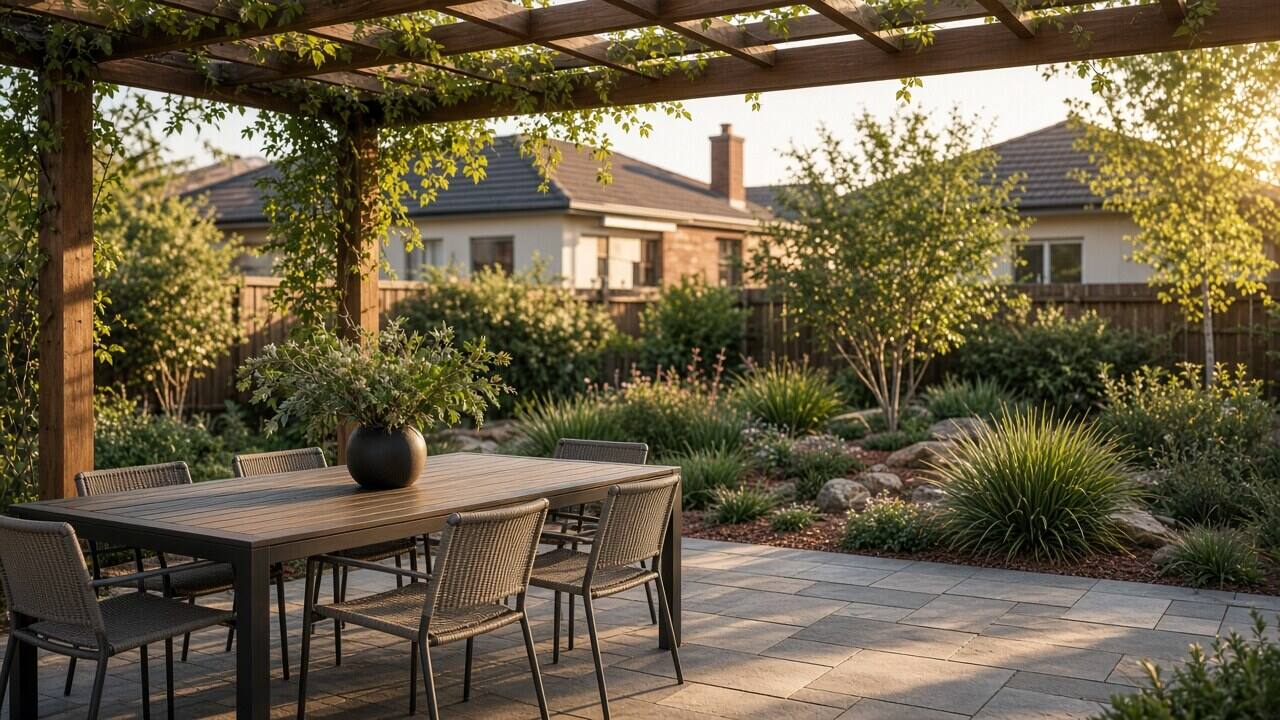
A well-designed patio transforms your backyard from unused space to your favourite room in the house. Whether you’re planning a covered entertaining area, an open sun trap, or a combination of both, getting the layout and materials right matters enormously for how you’ll actually use the space.
Here’s your practical guide to patio design for Australian conditions, with insights for Peninsula homeowners balancing coastal weather, entertaining needs, and long-term usability.
Covered vs Open Patios
Your first major decision: roof or no roof?
Covered Patios
Advantages:
- All-weather usability - rain, hot sun, light snow don’t stop you
- Furniture protection - less weathering, less maintenance
- Extended living space - feels like an outdoor room
- Climate control - ceiling fans work better with roof above
- Added home value - substantial improvement to property
Considerations:
- Higher cost - roofing structure adds significantly to budget
- Planning approval often required
- Reduces light to adjacent indoor rooms
- Building regulations apply (setbacks, height, etc.)
- Professional design recommended for structural integrity
Best for: Year-round entertaining, properties wanting outdoor room feel, protection from Peninsula weather variability, families with young children
Open Patios
Advantages:
- Lower cost - just paving/decking, no structure
- Full sun access - for sun worshippers and winter warmth
- Simpler approvals (or none required)
- Easier DIY - no structural concerns
- Flexible design - can add shade structures later
Considerations:
- Weather dependent - hot sun, rain limits use
- Furniture weathering - needs weather-resistant pieces
- Limited to fair weather entertaining
- No ceiling fan option
Best for: Sun-focused homeowners, budget-conscious projects, properties with existing nearby shade, coastal areas with milder weather
Combination Approach
Many Peninsula patios use hybrid designs:
- Covered area near house for dining/lounging
- Open paved area extending into garden for additional entertaining space
- Pergola or shade sails over part of open area
- Modular shade that can be adjusted seasonally
This gives flexibility for different weather and uses without full roof cost.
Patio Size Planning
Size matters more than most people realise. Too small feels cramped. Too large feels empty and costs more than needed.
Minimum Functional Sizes
Dining focus:
- 3m x 3m: Tight but functional for 4-person table and circulation
- 4m x 3m: Comfortable for 6-person dining
- 5m x 4m: Comfortable for 8-person dining with space for BBQ area
Lounge focus:
- 3m x 3m: Minimum for small outdoor lounge setting
- 4m x 4m: Comfortable for lounge setting + occasional chairs
- 5m x 5m: Spacious lounge area with room for movement
Combined entertaining:
- 6m x 4m: Dining table + separate lounge area
- 7m x 5m: Full entertaining space with distinct zones
- 8m x 6m: Large-scale entertaining with multiple furniture groupings
Scale to Your Block
Small blocks (under 400m²):
- 3.5m x 3m to 4m x 4m typically works
- Focus on one primary use (dining OR lounging)
- Avoid over-building - patio shouldn’t dominate garden
Medium blocks (400-800m²):
- 4m x 4m to 6m x 5m comfortable
- Can accommodate dining AND lounge zones
- Balance with lawn and garden bed space
Large blocks (800m²+):
- 6m x 5m to 8m x 6m+ possible
- Multiple zones and uses feasible
- Consider separate patio areas (e.g., pool area + house area)
Peninsula reality: Most residential blocks are 600-900m², which comfortably supports a 5m x 4m to 6m x 5m patio without overwhelming the backyard.
Patio Materials for Australian Climate
Concrete Paving
Plain concrete:
- Most affordable option
- Can be stamped, stencilled, or exposed aggregate
- Hot underfoot in summer
- Professional finish requires skill
- Very durable, low maintenance
Coloured/stamped concrete:
- Mid-range price
- Wide design options
- Still hot in summer
- Quality varies with installer experience
Best for: Budget-conscious projects, large areas, modern designs, properties wanting low maintenance
Pavers
Concrete pavers:
- Wide range of sizes, colours, finishes
- Mid-range price
- DIY-friendly (with research and effort)
- Easy to replace individual pavers if damaged
- Less heat retention than solid concrete
Clay pavers:
- Classic appearance
- Durable and attractive
- Mid to high price
- Colour won’t fade (fired clay)
- Feels more upmarket
Natural stone pavers:
- Premium appearance
- Higher cost
- Cooler underfoot than concrete
- Each piece unique
- Suits traditional and contemporary designs
Best for: Homeowners wanting design flexibility, DIY installations, properties wanting easier future modifications
Timber Decking
Treated pine:
- Budget-friendly timber option
- Requires regular maintenance (oiling every 1-2 years)
- 15-25 year lifespan with good maintenance
- Comfortable barefoot
- Natural appearance
Hardwood (merbau, spotted gum, jarrah):
- Premium timber choice
- More durable than pine
- Better weather resistance
- Still requires periodic maintenance
- Natural warmth and beauty
Composite decking:
- Low maintenance alternative
- No oiling required
- Consistent appearance
- Mid to high price
- Can get hot in direct sun
- Long lifespan (25+ years)
Best for: Properties wanting natural warmth, elevated or sloped sites, contemporary or coastal designs, homeowners who enjoy timber aesthetics
Peninsula consideration: Coastal salt exposure and variable moisture make hardwood or composite better long-term choices than treated pine for exposed timber decking.
Tiles
Outdoor porcelain tiles:
- Premium appearance
- Wide design range (including timber and stone looks)
- Very low maintenance
- Can be slippery when wet (choose textured finish)
- Professional installation recommended
- Higher cost
Natural stone tiles:
- Limestone, travertine, bluestone, granite
- Premium price point
- Beautiful natural finish
- Some stones stain or weather (choose appropriately)
- Professional installation essential
Best for: High-end installations, covered patios (reduces weathering), properties wanting refined finish, formal entertaining areas
Layout and Flow
Connection to House
Key principle: Your patio should flow naturally from your main living area.
Direct access:
- Sliding or French doors onto patio from living/dining room
- Minimal step down (or level) from interior floor
- Wide door opening (2.4m+ ideal for flow)
Visual connection:
- Patio visible from main living areas even when doors closed
- Creates feeling of expanded space
- Encourages use (out of sight = out of mind)
Poor connections:
- Patio accessed through laundry or secondary doors
- Multiple steps down from house
- Not visible from main living areas These layouts reduce usage dramatically - people won’t use what’s inconvenient.
Furniture Zones
Dining zone:
- Close to house and kitchen access
- Level area (wobbly table syndrome)
- Near power point for BBQ or appliances
- Ideally in covered section
Lounge zone:
- Can be separate area of patio
- Afternoon shade beneficial (hot sun = unused lounges)
- View-focused positioning
- Further from kitchen access okay
Circulation space:
- 800mm minimum around furniture for comfortable movement
- 1200mm better for high-traffic areas
- Consider traffic patterns (house to garden, to BBQ, etc.)
Multiple Entry/Exit Points
Large patios benefit from multiple access points:
- Main access from living area
- Secondary access to/from garden
- Path connection to side of house (for bins, garden access)
This prevents bottleneck issues during entertaining and improves everyday usability.
Climate Considerations
Summer Heat Management
Coastal Peninsula:
- Sea breeze provides natural cooling
- Less critical to orient for shade
- Focus on winter wind protection instead
Inland Peninsula:
- Summer heat significant
- Afternoon shade valuable (western side covered or shaded)
- Ceiling fans essential for covered patios
- Lighter-coloured paving reduces heat absorption
Winter Use
Sun access:
- North-facing patios capture winter sun
- Makes covered patios usable in cooler months
- Valuable for year-round entertaining
Wind protection:
- Peninsula winds (especially coastal) limit cool-weather patio use
- Side screens, glass panels, or strategic planting help
- Enclosed sides with open front works well
Rain Management
Drainage:
- Patio should slope away from house (minimum 1:100 fall)
- No pooling water after rain
- Consider drainage to garden beds or stormwater
Gutter and downpipes:
- Covered patios need proper roof water management
- Overflowing gutters onto patio = poor design
- Direct water to tanks or drainage
Lighting and Ambience
Patio lighting transforms usability and creates atmosphere:
Task lighting:
- Over BBQ area
- Dining table (overhead or feature pendant)
- Adequate for food prep and eating
Ambient lighting:
- Wall sconces
- Festoon/string lights
- Uplighting on feature plants or walls
Safety lighting:
- Step edges highlighted
- Path to/from patio
- Low-level lights that don’t glare
For more detailed outdoor lighting guidance, see our guide on outdoor lighting for Melbourne gardens.
Budget Planning
DIY Basic Patio
Simple paver or timber deck patio:
- 3m x 3m: $1,500-3,000 (materials + DIY labour)
- 4m x 4m: $2,500-5,000
- 5m x 4m: $3,500-7,000
Assumes basic materials, DIY installation, simple level site.
Professional Installation (Open Patio)
Concrete pavers/standard finish:
- $200-350 per m² installed
Premium pavers or stone:
- $300-500+ per m² installed
Timber or composite deck:
- $300-600+ per m² installed
Covered Patio Addition
Roof structure adds significantly:
- Basic gable roof: +$10,000-20,000 (small to medium size)
- Flat roof with insulation: +$15,000-25,000
- Architectural design, lighting, fans: +$20,000-40,000+
Professional design and construction required for covered structures.
Common Patio Design Mistakes
1. Too Small
Saving money with undersized patio creates cramped, unusable space. Better to delay and do it properly than build too small.
2. Poor House Connection
Patio accessed through side door or down multiple steps won’t get used. Connect it properly to main living space.
3. Ignoring Drainage
Water pooling on patio or against house causes ongoing problems. Slope away from house always.
4. All Sun or All Shade
Balance matters. Some sun, some shade creates usable space across different times and weather.
5. Forgetting Power Points
Adding outdoor power after patio built costs more than including during construction. Plan for BBQ, fans, lighting, outdoor heaters.
DIY vs Professional Installation
DIY Suitable For:
- Small to medium open patios (under 25m²)
- Simple rectangular layouts
- Level or near-level sites
- Paver or basic timber deck construction
- Homeowners with reasonable handyman skills
Requirements: Site preparation, level work, proper base/footing, drainage consideration, time and patience
Professional Recommended For:
- Covered patios (structural requirements)
- Complex layouts or levels
- Large areas (30m²+)
- Difficult sites (slopes, poor drainage, clay soil)
- Premium materials (stone, tile, architectural timber)
- When permits required
Professional patio construction includes design, proper drainage, structural integrity (for covered), quality installation, and compliance with regulations.
Planning a substantial outdoor entertaining area - covered patio, deck, or comprehensive outdoor living zone? Peninsula Hard Yards specialises in creating functional, beautiful outdoor spaces across the Mornington Peninsula.
Disclosure: We share links to related local services that serve our readers in the Peninsula area.
Permits and Approvals
Most councils require permits for:
- Covered patios (building permit)
- Patios over certain sizes
- Patios within setback distances
- Changes to stormwater drainage
Check before starting - unapproved structures cause problems when selling or claiming insurance.
Simple open paver patios often don’t require permits, but verify with your local council.
Final Thoughts
Great patio design balances practical function with aesthetic appeal:
- Size appropriate to your block and usage
- Location connected to main living areas
- Materials suited to Australian climate and your budget
- Covered/open balance for year-round use
- Layout supporting how you’ll actually use the space
Start with clear understanding of how you’ll use your patio:
- Daily family meals or occasional entertaining?
- Morning coffee or evening gatherings?
- Sun worship or shade seeking?
- Year-round or fair-weather use?
These answers drive smart design decisions.
Don’t over-build beyond what you’ll realistically use or maintain. A modest, well-designed patio gets more use than an over-ambitious project that overwhelms your garden and budget.
And remember: your patio is a long-term investment. Quality materials and proper installation cost more upfront but deliver decades of outdoor living enjoyment.
The right patio design transforms your relationship with your backyard - it becomes a space you use daily, not just admire from inside.
Need a Hand?
Professional lawn and garden services when you need them. Get a quote from our trusted Peninsula partners.
Contact Mowing Magic or Peninsula Hard Yards →Disclosure: We share links to related local services that serve our readers in the Peninsula area.